Sunday, 13 December 2015

Chocolate Rudolph cupcakes


Rudolf, the red-nose reindeer
Had a very shiny nose
And if you ever saw it
You would even say it glows

All of the other reindeers
Used to laugh and call him names
They never let poor Rudolph
Join in any reindeer games

Poor Rudolph, literally excluded from the group because he was different from (and so much cuter than!) the rest. Absolutely not a legit reason to be ostracised!


Then one foggy Christmas Eve
Santa came to say
Rudolph with your nose so bright
Won't you guide my sleigh tonight?

Then how the reindeers loved him
As the shouted out with glee
Rudolph the red-nose reindeer
You'll go down in history!

They don't seem to be very pleasant reindeers, only cordial when they realised Rudolph had some level of importance. Orbiquek to them, I'd say. However, Rudolph being as good-natured as he was adorable, welcomed the new friendship with open antlers. I adore his virtuously forgiving nature, so chin chai and amiable. 

In celebration of the Christmas season and our red-nosed friend, I made Rudolph a dozen others just like him!


These are piped chocolate eyes and antlers. They hardened very quickly on this cold, freezing day.
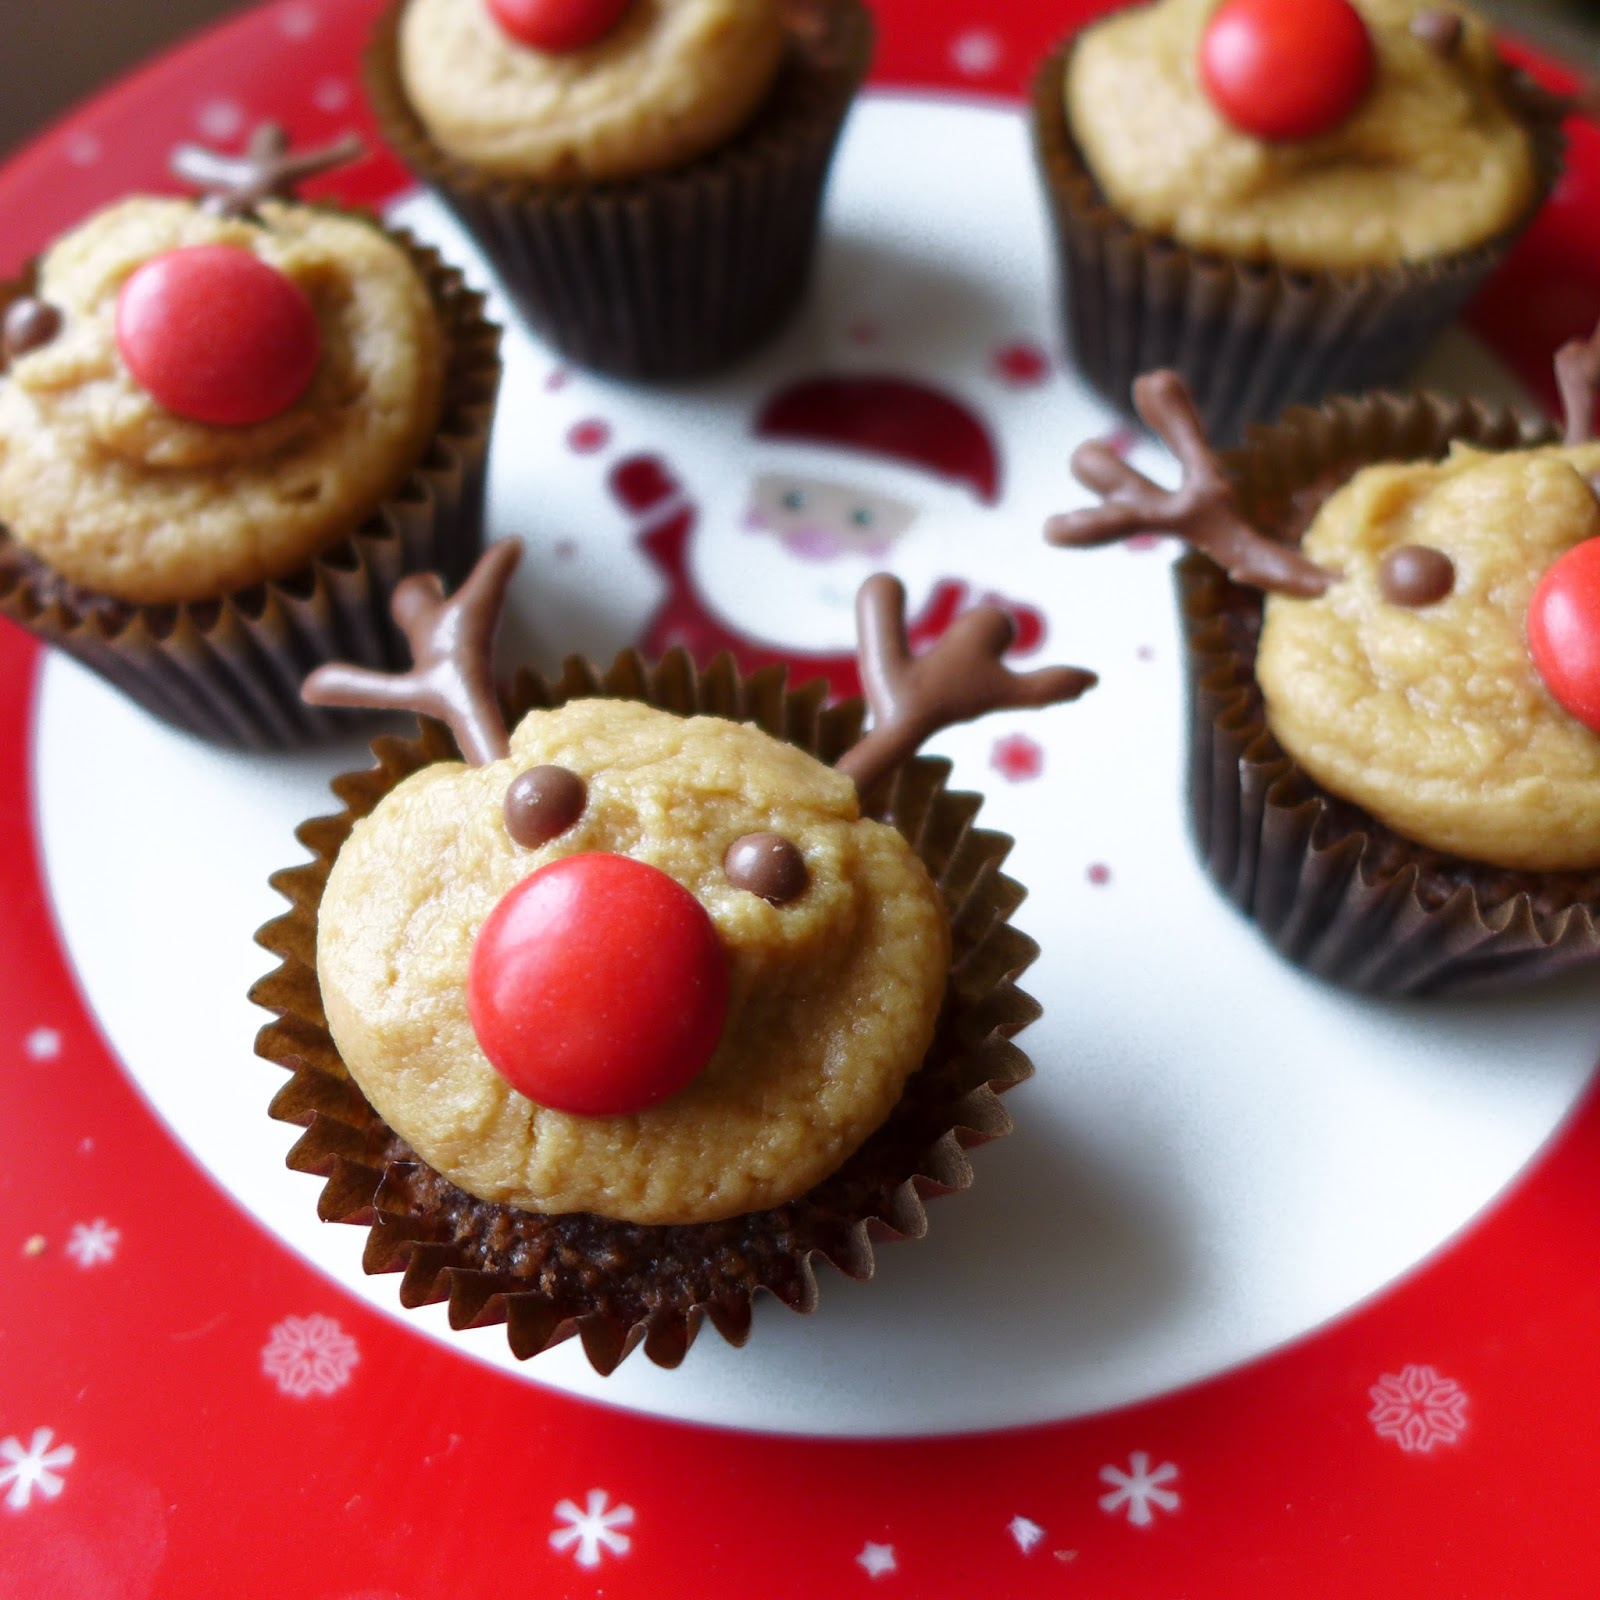

You definitely made history, Rudolph!

Chocolate cupcakes
What?
  • 1 cup sugar
  • 1 cup plain flour
  • 1/2 cup cocoa powder
  • 1 1/2 tsp baking powder
  • 1/2 tsp salt
  • 1 egg
  • 1/2 cup milk
  • 1/4 cup olive oil
  • 1 1/2 tsp vanilla extract
  • 1/2 cup hot water
How?
  1. Stir the sugar, flour, cocoa powder, baking powder and salt together.
  2. Add in egg, milk, oil and vanilla extract and mix until incorporated.
  3. Pour in the hot water and stir until an even consistency is achieved. The batter will be very thin.
  4. Line muffin tins with paper liners and fill the liners with the batter to about 3/4 full. 
  5. Bake the cupcakes at 180 degC for about 20 minutes.
  6. Cool completely on a wire rack before frosting.
To make Rudolph...
What?
  • Writing milk/dark chocolate
  • Parchment paper
  • Coffee buttercream
  • Piping bag
  • Red chocolate buttons (I used red M&Ms)
How?
  1. Melt the chocolate according to the instructions on the tube and pipe out eyes and antlers for the reindeers onto parchment paper. Leave to harden.
  2. Prepare the coffee buttercream (click link for the recipe!) and put it into the piping bag. Snip off the end of the bag and pipe the buttercream onto the cupcake in a circular manner until almost the entire cupcake is covered.
  3. Use a red chocolate button as the nose and place it in position on top of the buttercream.
  4. Add in the chocolate eyes and antlers for the reindeer.

Monday, 7 December 2015

Chocolate walnut cookie slab

This is the start to a joyful December. I love this time of the year - the warm, fuzzy feeling as we approach Christmas. It is a merry, joyous and festive season, underlined with tranquility that is so surreal. Then comes New Year (Double celebration! Woohoo!), which gives the end of winter holidays a brand new beginning to look forward to.

This December is a little extra special because I have a special guest.

Who's that, you ask?

”She is your mirror, shining back at you with a world of possibilities. She is your witness, who sees you at your worst and best, and loves you anyway. She is your partner in crime, your midnight companion, someone who knows when you are smiling, even in the dark. She is your teacher, your defense attorney, your personal press agent, even your shrink. Some days, she's the reason you wish you were an only child.” 
~ Barbara Alpert


We did many things together this week. We shopped from the city to the outlet, had tea in quaint teapots and tiny tea cups, delighted in cakes and savoury pre-meal snacks, explored the old city streets and touristy sights... I relished every minute we spent together, the heart-to-heart talks and all the silly moments. :) And of course, we have to bake together this holiday!


From what was supposed to be a-dozen-cookies, to a huge slab of cookie on the cookie sheet. Don't ask. It was intentional. :D We reckoned the slab looked like chocolate brittles so we broke it into serving-sized pieces. This turned out to be a cookie that was crispy on the outside and chewy on the inside.


And it was extra tasty when you have someone to share it with.

The best thing about having a sister was that I always had a friend. 
~ Cali Rae Turner

What?
  • 2 cups icing sugar
  • 1/2 cup cocoa
  • 1/2 tsp salt
  • 1 1/2 cups chopped walnuts
  • 2 eggs
  • 1 tsp vanilla essence
How?
  1. Mix icing sugar, cocoa, salt and chopped walnuts.
  2. Stir in the eggs and vanilla essence until well combined.
  3. Pour the batter onto a cookie sheet lined with parchment paper.
  4. Bake in a preheated oven at 180 degC for 15 minutes.
  5. Cool completely on a cooling rack before cutting to serve.

Monday, 26 October 2015

Quark pumpkin cheesecake


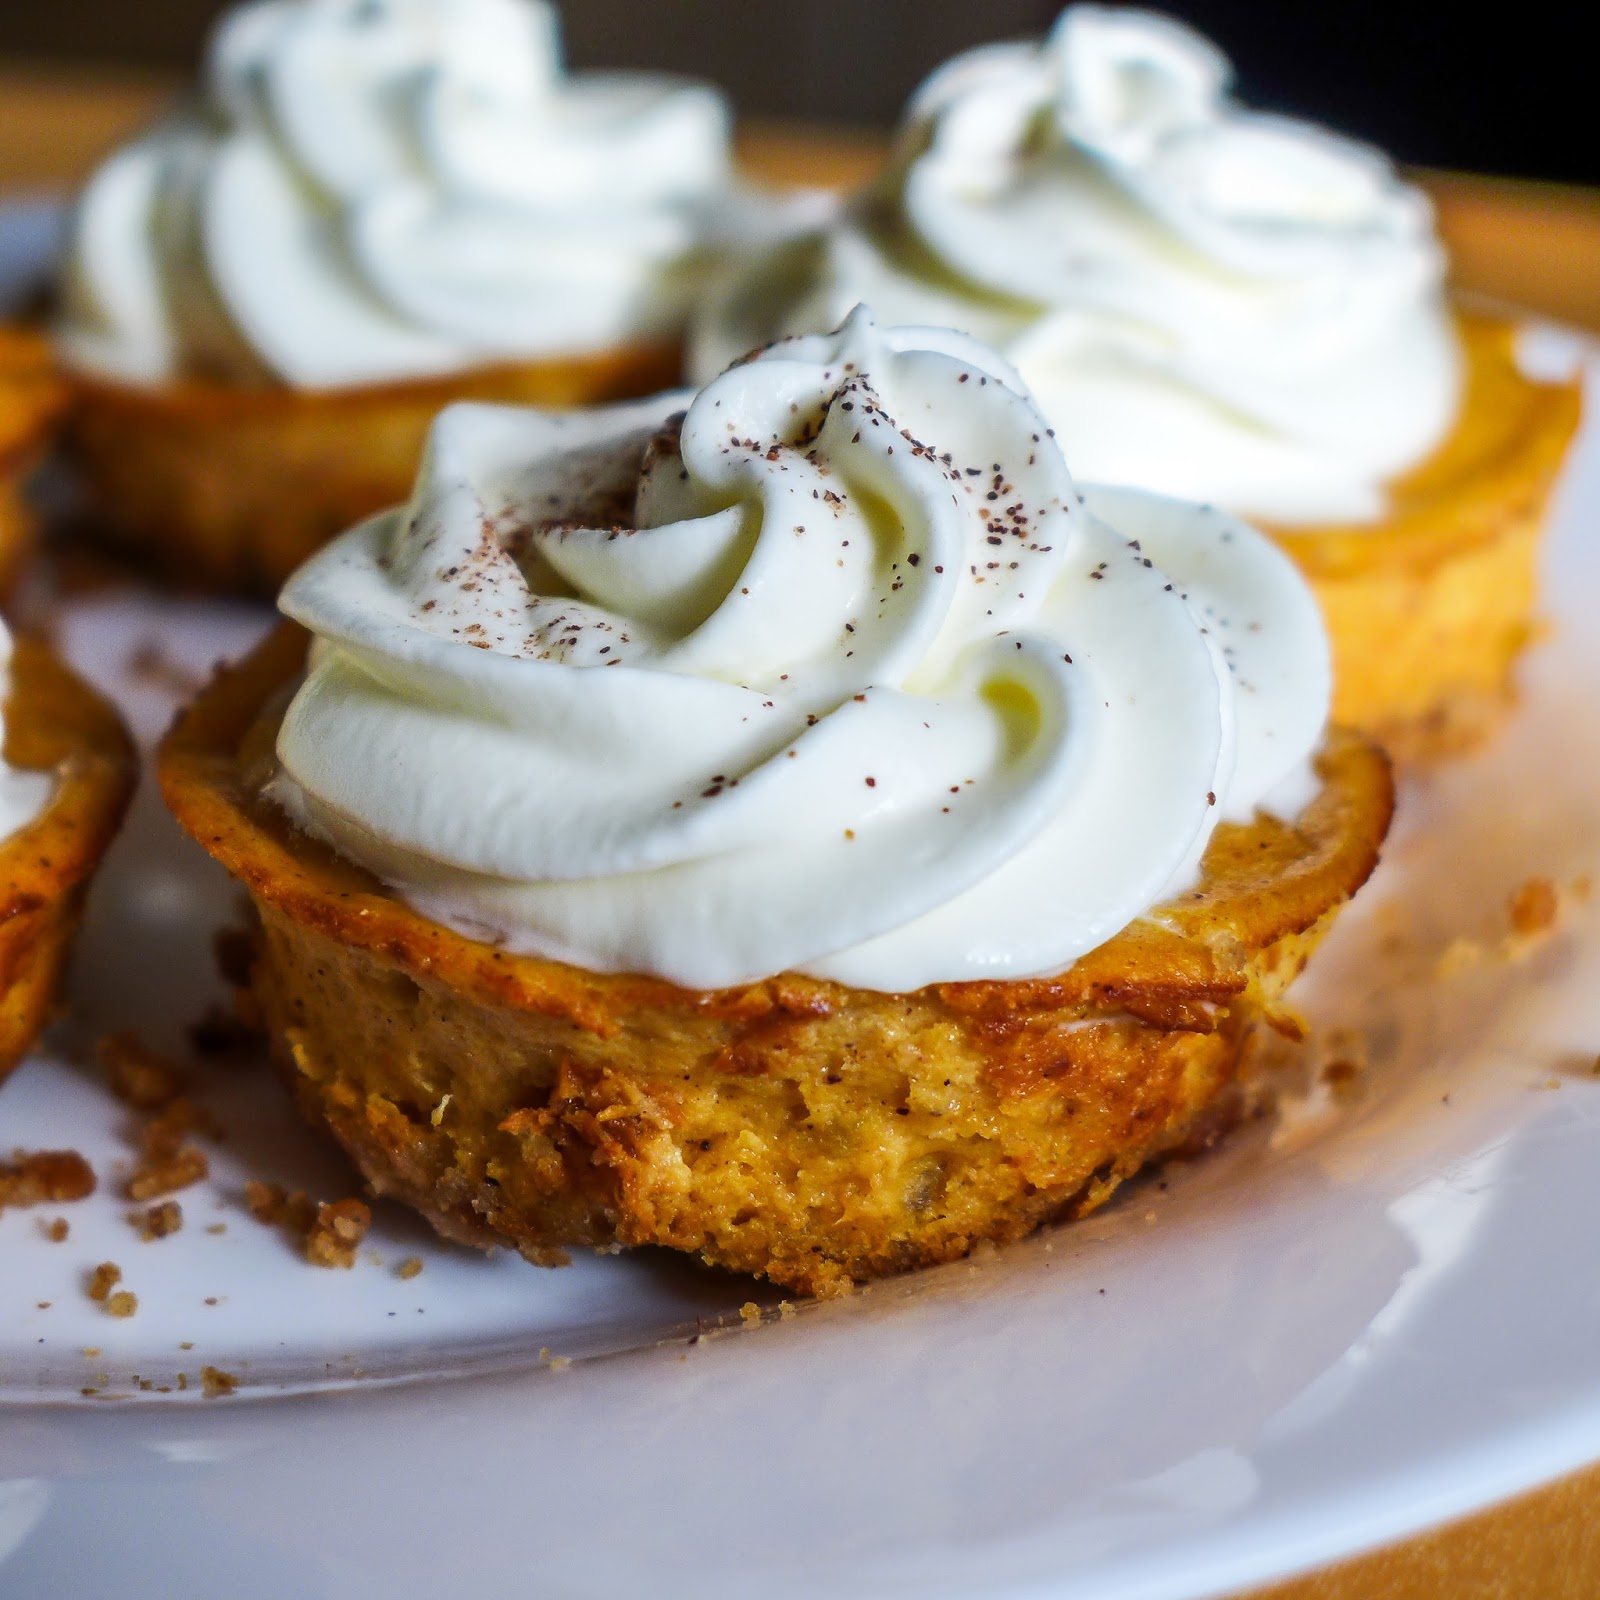
For some time now, I have wanted to try baking with pumpkin. And since it is now fall, pumpkin seems to be the most fitting accompaniment to the season.


I used quark in place of cream cheese. I first had a quark cheesecake in Germany at a welcoming party. It tasted lighter than those made with cream cheese, yet with no compromise in taste. So here's my virgin attempt with quark and pumpkin! I am pretty much pleased with the turn out: a spiced pumpkin cheesecake, top with fresh velvety homemade whipped cream that balances out the rich flavours.


"Autumn is a second spring, when every leaf is a flower." - Albert Camus

What?
Crust base
  • 3/4 cup digestives, crumbled
  • 1 tbsp butter, melted
  • 1 tbsp brown sugar
  • 1/4 tsp cinnamon
Cheesecake filling
  • 250 g quark
  • 1/2 cup pumpkin purée
  • 1 egg
  • 1/2 cup sugar
  • 1/2 tsp ground cinnamon
  • 1/4 tsp ground nutmeg
  • 1/4 tsp ground ginger
  • 2 tbsp plain flour
  • 1 tsp vanilla
Whipped cream
  • 1/2 cup whipping cream
  • 1 tbsp sugar
How?
Crust base
  1. Combine the ingredients for the base and mix with a fork.
  2. Scoop about 1 tbsp of the mixture into a base of muffin tin and press down to form the base.
Cheesecake filling
  1. Mix the quark, puree, eggs, sugar and spices until smooth.
  2. Add flour and vanilla to the mixture and stir until combined.
  3. Pour the filling over prepared based.
  4. Bake in a preheated oven at 180 degC for 20 minutes.
  5. When cakes are done, remove from the oven and let it cool.
Whipped cream
  1. Beat cream until soft peaks form. 
  2. Add in the sugar and beat until soft peaks form again.
  3. Put into a piping bag and pipe on cooled cheesecakes.

Saturday, 24 October 2015

Pancakes


It has been a exasperating week.

This week was literally a cycle of testing, failing, testing, failing, testing and even more failing. The memoirs of my research journey is speckled with plentiful maddening defeats, sufficient to discourage and demoralise.

Many times a day I've had to abort task, go back to basics and try again, and then come to nothing at the end of the day.

And to amplify my frustration, the painful blistering on my fingers decided to pay me a unsolicited visit. Having diagnosed differently 4 times by the doctors for whatever these were, I gave up making another appointment (you'd probably only get one about 2 weeks later anyway...). My fingers are mottled with red swellings, making them tender, fat and ugly.

It is tiresome, isn't it? To be caught in this vicious cycle of self-pity?

In a bid to ameliorate the pain (mentally and physically...), I make myself some feel-good pancakes. One whole mountain of fluffy goodness for my own consumption.


Slapped with butter and drizzled with honey, I began shedding off the mountain layers from the top down. A happy tummy makes a happier mind.


What?
  • 1 egg
  • 3/4 cup milk
  • 1 cup plain flour
  • 1 tsp baking powder
  • 1 tbsp sugar
  • 1/2 tsp salt
  • Butter, for greasing pan
How?
  1. Whisk the egg until fluffy.
  2. Mix in the milk.
  3. Add the dry ingredients (plain flour, baking powder, sugar and salt) and mix well.
  4. Heat up a frying pan and lightly grease it with some butter.
  5. Pour some batter onto the pan and tip the pan to spread it out.
  6. When bubbles start to appear on the surface, flip it over to cook the other side.
  7. Repeat until all the batter is cooked.

Saturday, 17 October 2015

Walnut cookies

"Nom nom... I'm having cookies..."


Last week B tempted me with cookies while on Skype. A week later, I baked some for myself. Now I'm just waiting for him to come on-line so I can munch on some too. :p


These are buttery, crumbly cookies with a crunch in every bite. The recipe calls for a 1:1 volumetric portion of chopped walnuts to flour, resulting in a rich nutty flavour of the cookies. I absolutely love walnuts! Replete with omega-3 fatty acids, walnuts are known as the ultimate brain food. They can also keep one in a positive mood and relieve sleeplessness for good measure!


The final step in this recipe involves dipping the cookies into icing sugar. Initially I thought of it as redundant. But ohhh nooo... the eventual outcome was brilliantly delicious! Ipso facto, coating with icing sugar is not optional!


These cookie balls can last up to four days in an airtight container at room temperature...

... but they won't. ;)


What?
  • 1 cup plain flour
  • 1/4 tsp salt
  • 1/4 tsp baking powder
  • 3 tbsp brown sugar
  • 1 cup chopped walnuts
  • 1 tsp vanilla extract
  • 1/2 cup (about 113 g) unsalted butter, softened
  • 2 cups icing sugar, for coating
How?
  1. Line a baking sheet with parchment paper and side aside.
  2. Mix flour, salt, baking powder, brown sugar and walnuts together.
  3. Add the vanilla extract to the mixture and give it a stir.
  4. Work the butter into the mixture with your hands until a crumbly, coarse mixture is achieved,
  5. Using your hands, press and shape a handful of dough into balls and place them onto the prepared baking sheet. The balls do not have to be spaced far apart as they do not rise or spread in the oven.
  6. Bake in a preheated oven at 160 degC for 25 minutes until the cookies are slightly browned.
  7. Remove the cookies from the oven and let them cool before coating the in icing sugar.
Adapted from: Joy the Baker

Wednesday, 14 October 2015

Raspberry pie


What is a raspberry pi?

"The Raspberry Pi is a low cost, credit-card sized computer that plugs into a computer monitor or TV, and uses a standard keyboard and mouse. It is a capable little device that enables people of all ages to explore computing, and to learn how to program in languages like Scratch and Python. It’s capable of doing everything you’d expect a desktop computer to do, from browsing the internet and playing high-definition video, to making spreadsheets, word-processing, and playing games." from What is a raspberry pi

As intriguing as that sounds, I made an edible version of one today! With the scraps of pastry dough left, they were made into a messy lattice. This raspberry pie could definitely do with a bit more sugar if you prefer it sweeter; it was a tad too tart it made me squint a little. Nevertheless home-made ones taste better (and healthier!) and you can enjoy one fresh out of the oven! I did, and it made a happy perk-me-up on a mid-week. :)


Pie crust
What?
  • 125 g flour, and some extra for working the dough
  • 1/2 tsp salt
  • 100 g cold unsalted butter
  • 1/4-1/2 cup cold water
How?
  1. Mix flour and salt together.
  2. Cut the cold butter into small pieces. Using a fork or a pastry cutter, cut the butter into the flour mixture until a crumbly texture is obtained.
  3. Add in cold water slowly and mix with your hands until the dough comes together.
  4. Divide the dough into 2 portions. Roll out one portion and place it in a baking dish (6" x 6"). Prick the dough with a fork and bake in a preheated oven at 180 degC for 15 minutes. 
  5. Roll out the other portion of the dough and cut it into strips to make the lattice for the pie. Set aside for later.
Raspberry filling
What?
  • 2 cups raspberries
  • 2-3 tbsp sugar
  • 2 tbsp flour
  • 1 egg, for brushing
How?
  1. Toss the raspberries with the sugar and flour until the raspberries are coated.
  2. Pour the coated berries into the baked pie crust.
  3. Weave the dough strips into a lattice on top of the pie. 
  4. Lightly brush the top crust with a whisked egg.
  5. Bake in a preheated oven at 180 degC for 60 min, or until the crust becomes golden.

Saturday, 10 October 2015

Chocolate swiss roll with coffee buttercream


Here's a second attempt at swiss roll. For easier rolling and to attain a swiss roll with a smoother outer cover, the sponge cake should be rolled up once it is out of the oven before it is left to cool.


The best part of this swiss roll is the coffee buttercream! This coffee-flavoured buttery-sugary concoction has a rich aroma and is absolutely lip-smacking. I could eat it on its own! I was impatient and started coating the mildly warm cake with it, and immediately regretted my decision as I watched the buttercream melt into my chocolate sponge cake. *a dramatic NOooooo...*


Nevertheless, this cake made a delightful elevenses. Enjoy with a cuppa!

Chocolate swiss roll
What?
  • Olive oil, for greasing
  • 100 g caster sugar, and some extra 
  • 2 eggs
  • 1 tsp vanilla extract
  • 1 tbsp warm water
  • 75 g plain flour, sifted
  • 25 g cocoa powder, sifted
  • Icing sugar, for dusting (optional)
How?
  1. Line a swiss roll tin with parchment paper and brush it with olive oil. Dust with some caster sugar.
  2. Whisk the eggs and sugar together until it is light and fluffy.
  3. Mix in the water and vanilla extract.
  4. Mix the cocoa powder and flour together in another bowl. Fold in the flour mixture to the egg batter, one-half each time.
  5. Pour the batter onto the prepared tin and bake in a preheated oven at 180 deg C for 15 minutes.
  6. Lay a piece of parchment paper on top of a damp tea towel and sprinkle it with caster sugar. Turn the cake onto the sugared parchment paper and peel the parchment paper off the base of the cake.
  7. Make an incision (do not cut through!) about 1cm from the edge where you want to start rolling. With another parchment paper placed on the top of the cake, roll the cake up carefully and leave it to cool.
  8. Prepare the buttercream (recipe below).
  9. When cake has cooled, unroll the cake and spread butter over it, leaving a border at the end (about 1"). 
  10. Roll the cake up again. Sprinkle with some icing sugar before serving.
Coffee buttercream
What?
  • 50 g unsalted butter, softened
  • 100 g icing sugar
  • 2 g coffee granules 
  • 1 tbsp hot water
How?
  1. Cream together the butter and the icing sugar.
  2. Mix coffee granules in 1 tbsp hot water and add it to the creamed mixture. Blend well.