Sunday, 13 November 2016

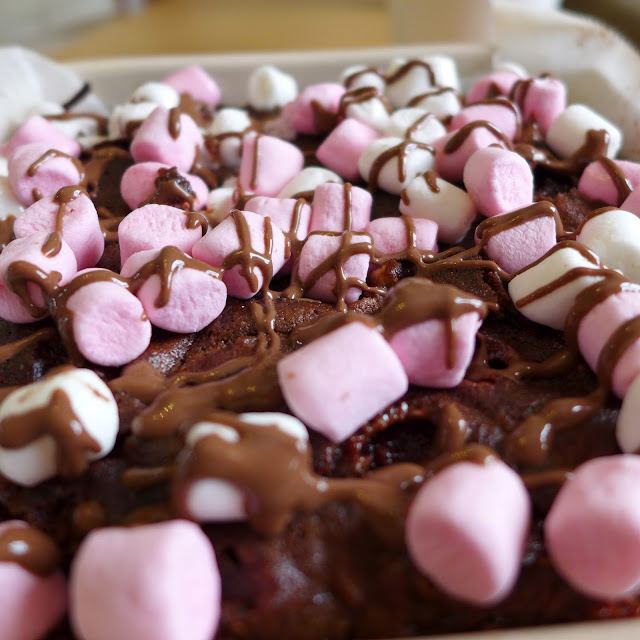
Chewy oatmeal raisin cookies


When I think of an oatmeal cookie, one that is crispy on the outside but soft and chewy in the middle and studded with plump raisins comes to mind. Oatmeal cookies are a timeless classic, and to me, somewhat comforting. It kinda reminds me of home.


These cookies with their chewy texture, warm blend of nutty oats and spices make them a favourite among many. The dash of cinnamon and pinch of nutmeg create a delicious depth of flavour and intense aroma as the cookies bake away in the oven. I love the smell of the spiced bakes that fills my kitchen! Old-fashioned rolled oats were used in this recipe for a heartier and thicker homemade goodness.

These cookies are good for any time of the year, though the pleasant aroma hits me with a holiday-season-cookie feel.

It's almost Christmas once again! Only 42 days to be exact. Counting down to be with family again! Nothing beats that, not even oatmeal cookies. But they do make me feel a littleeee better. ^^


My lovely November blooms! <3

What?
  • 1 cup butter, softened
  • 1 cup granulated sugar
  • 1/4 cup brown sugar
  • 2 eggs
  • 2 tsp vanilla extract
  • 1 1/2 cups plain flour
  • 1 tsp baking soda
  • 1/4 tsp salt
  • 1 1/2 tsp ground cinnamon
  • 1/8 tsp ground nutmeg
  • 3 cups rolled oats
  • 1 cup raisins
  • 1/2 cup chopped nuts (optional!)
How?
  1. Soak raisins in warm water for 10 minutes to make them plump. (Blot with kitchen towels to dry them before use!)
  2. Combine flour, baking soda, salt, cinnamon and nutmeg in a bowl and set aside.
  3. In a separate bowl, cream butter and sugar until smooth. Add the eggs and vanilla and mix until well blended.
  4. Mix the flour mixture into the butter mixture until combined.
  5. Gently stir in the oats and plumped raisins. The dough will be thick and sticky! Chill it for about 30 minutes in the refrigerator.
  6. Shape the dough into rounded balls (about 1 1/2 tbsp each) and place them about 2 inches apart on a baking sheet lined with parchment paper or baking mats. Flatten the dough slightly.
  7. Bake for 8-10 minutes in a preheated oven at 180 degC until lightly browned. Remove from the oven and cool on the baking sheet for 5 minutes before transferring to a wire rack to cool completely.

Sunday, 6 November 2016

Almond and apple cake

Daylight saving time ends, marking the start of the cold season once again. We've had an unusually balmy summer this year, and the glorious warm days seemed to have held up till late September.

Then the cold sets in, all too sudden, plunging to below 10 degC, and I found myself rummaging through my wardrobe to find my night socks. I have cold toes.

Despite the chills, fall is a pretty season. The most spectacular in my opinion. I love the red, the orange and the yellow of fall foliage - talk about the colours explosion of the leaves. Even when they fall, the leaf piles turn the ground into a beautiful bed of colours.


And undoubtedly, when it's cold, it's nice to keep the oven working - and even better to have warm cakes and pies.


Since fall and apples go together, I made an almond and apple cake (mini one, halved the recipe) over the weekend so I can treat myself to a warm dessert. Simple to make, and delightfully moist!


I think this would go well with ice cream or custard, but I enjoyed mine on its own, warm out of the oven.


What?
  • 180g butter
  • 2/3 cup sugar
  • 1 tsp vanilla essence
  • 3 eggs
  • 1 cup almond meal
  • 1 cup plain flour
  • 1/2 tsp baking powder
  • 1/2 tsp salt
  • 1/3 cup milk
  • 2 tsp ground cinnamon
  • 2 small red apples
How?
  1. Mix the flour, baking powder and salt. Set aside.
  2. Cream butter, sugar and vanilla. When pale and creamy, beat eggs into the mixture, one at a time.
  3. Stir in the almond meal.
  4. Add half the flour mixture and half the milk and stir until well combined. Repeat with the remaining flour mixture and milk. Stir in ground cinnamon.
  5. Core the apples and slice them thinly. Arrange the apple slices over the base of the lined cake pan. Overlap the apple slices slightly. Spoon the batter into the pan and smooth out the surface.
  6. Bake in a preheated oven at 170degC for about 30-40 minutes until a skewer inserted into the centre comes out clean. Let the cake cool for about 10 minutes before turning it over into a serving plate.
  7. Serve warm.

Saturday, 22 October 2016

Bread and butter pudding

I had some leftover bread in the fridge and was contemplating chucking them.

Should I steam the bread? Or make some french toast?

How about some bread and butter pudding?


What better way to use up stale bread? :) Bread and butter pudding is the ultimate comfort food and would be a canny way for using up bread/buns/loafs that are almost past their best.


This sweet, rich and stodgy dessert goes great with custard or ice cream, and in this unforgivingly cold (and sometimes wet) weather, I think it pairs best with a cup of hot cocoa. For a little extra kick, you can soak the raisins in rum or add a shot of liquor to the egg mixture.


Bread and butter pudding makes a warm, comforting dessert, perfect for an after-dinner treat. It reheats well in the oven (covered with a foil so it doesn't dry out too much), so you can have the warmed leftovers for breakfast on a cold morning too! :)

What?
  • 4 slices of bread
  • Butter for greasing and buttering
  • Raisins
  • Ground nutmeg
  • Ground cinnamon
  • 1 1/2 cup milk
  • 1 egg
  • 25 g sugar
How?
  1. Cut the crusts off bread and slice it diagonally into triangles.
  2. Spread the bread with butter and place a layer in a greased dish, butter side up. Sprinkle the layer of bread with raisins, nutmeg and cinnamon (to taste!),
  3. Add another layer of buttered bread. Alternate with the raisins, nutmeg and cinnamon until all the bread have been used. 
  4. Warm the milk to about 65 degC (do not boil).
  5. Beat the egg with half of the sugar and stir it into the warm milk.
  6. Strain the egg mixture over the bread, and sprinkle the top with raisins, nutmeg, cinnamon and the remaining sugar. 
  7. Leave it to stand for 30 minutes.
  8. Bake in a preheated oven at 180 degC for 30-40 minutes until the custard has set and the top slightly browned.

Saturday, 1 October 2016

"I want to marry you" cookies


Recently, my social media newsfeed page has been constantly flooded with updates of proposals, engagement, and marriages. While scrolling down the page, you'd see pretty bouquets, flashy rings, white gowns and sometimes even lengthy declaration of love and "thanksgiving" speeches (especially on those auspicious weekends!). All these "signs" on social media is actually pretty much indicative of the phase in life where people of my age are supposed to be, if everyone else is taken to be the benchmark.

In the midst of all the fancy-frilly-lovey-dovey, a photo labelled "Marry me cookies" caught my eye.

Did someone bake cookies for a proposal?


Well they say that the best way to someone's heart is through the stomach.

This should be a damn good cookie then.


I found out later that these cookies aren't particularly made for a proposal, but it has been said that they were so good to a point that upon gifting them, love would usually ensue. I, for one, find it most remarkable that these cookies were made all in one pan. In place of creaming the butter and sugar as in most cookie recipes, it was intriguing that this particular one simply melts the butter and sugars in the pan and literally have everything else mixed in after. You get the rich toffee flavour from the dissolved sugar in hot melted butter, crispy outsides with soft centers, and that mysteriously unique cinnamon flavour - all these without the need to wash up extra mixing bowls or a mixer after! I would marry that.

Try these, whether in need for inspiring or eliciting a marriage proposal or not. ;)


What?
  • 1 cup butter
  • 1 1/4 cups dark brown sugar
  • 1/2 cup granulated (white) sugar
  • 1 egg
  • 1 egg yolk
  • 1 tsp vanilla extract
  • 2 cups flour
  • 1 cup uncooked rolled oats
  • 1/2 tsp baking soda
  • 1/2 tsp salt
  • 1/4 tsp ground cinnamom
  • 1 cup white chocolate chips
  • 1 cup chocolate chips
How?
  1.  Melt the butter in a saucepan until melted. Remove from the heat.
  2.  Stir in the brown sugar and white sugar until incorporated and smooth. Chill in the fridge for 10 min.
  3. Remove from the fridge and stir in the egg, egg yolk and vanilla.
  4. Add the flour, oats, baking soda, salt and cinnamon and mix together.
  5. Stir in the chocolate chips.
  6. Roll the batter into 1-1/2 inch sized balls and place on a baking sheet lined with parchment paper.
  7. Place the baking sheet into the fridge and chill for 30 minutes.
  8. Bake the chilled cookies in a preheated oven at 160 degC (325 degF) for 12 to 14 minutes.
  9. Allow the cookies to cool for about 5 minutes on the baking sheet before transferring them onto a cooling rack.
Adapated from: Cooking channel

Sunday, 7 August 2016

Almond flour blondies


Blondies are like the cousins of brownies. Though without the cocoa or chocolate used in brownie batters. blondies are every bit as rich and delicious as their chocolatey counterpart.


These unintentionally gluten-free blondies turned out to be one of my favourite blondies-brownies recipe! I usually like my brownies fudgy-chewy, and these almond flour blondies fulfil the requirements of being dense, moist and chewy. Almond flour has been used frequently in baking as a gluten-free flour substitute. With its reputation of being high in protein, low in carbohydrates and sugars, almond flour has been a popular alternative to wheat flour.


As mentioned, there is no special reason why these blondies are gluten-free or grain-free; it just happened that I have almond flour sitting in the baking pantry. And I guess it wouldn't hurt to have seemingly healthier treats! :p 

The almond flour made the blondies more dense and grainier than it would be if I had used plain flour. If you are using plain flour in this recipe, just substitute almond flour 1:1 with plain flour. For a little extra crunch, walnuts or pecans can be added.


Slice the brownies into bars/squares to serve, or into bite-sizes as I prefer. Or if it's just for your consumption, go ahead and eat it out of the dish!

What?
  • 50 g butter
  • 1/4 cup brown sugar
  • 1/4 cup white sugar
  • 1 egg
  • 1 tsp vanilla extract
  • 1 cup almond flour
  • 1/2 tsp baking powder
  • 1/4 tsp salt
  • 1 cup chocolate chips ( I used a mix of dark, milk and white)
  • 1/2 cup chopped nuts, if desired (e.g. walnuts, pecans)
How?
  1. Cream the butter and sugars together. Add in egg and vanilla extract and mix until light and fluffy.
  2. Add in the almond flour, baking powder and salt. Mix until combined.
  3. Stir in the chocolate chips and nuts.
  4. Pour the batter into a greased baking dish and smooth it out. 
  5. Bake in a preheated oven at 180 degC for 20-25 minutes until golden. Leave it to cool (or not!) before serving!
Adapted from: Meaningful eats

Sunday, 31 July 2016

Lemon macarons

I'm not particularly good at facing up to the hard times. But I know I have to quickly come to terms with failure to overcome it.

In my down moments, I am heartened to have people who continued to believe in me and assured me that it will all be okay. And I'm okay. :)

"When life knocks you over, roll over and look at the stars."

Since I've been thrown some lemons, here are some sweet and tart lemon macarons for dessert.


What?
Lemon macaron shells
  • 100 g almond flour
  • 100 g icing sugar
  • 2 egg whites
  • 1/4 cup sugar
  • 1 tsp lemon zest
  • 1/2 tsp lemon juice
  • 1/2 tsp vanilla extract
  • Yellow gel colouring (optional)
Lemon buttercream
  • 30 g butter
  • 1 cup icing sugar
  • 1 tbsp lemon juice
  • 1/2 tsp vanilla extract
How?
Lemon macaron shells
  1. Sift the almond flour and icing sugar together and set aside.
  2. In a clean mixing bowl, beat the egg whites on medium speed until frothy. Increase the speed to medium high. Gradually add in the sugar and beat until stiff peaks start to form. Add the lemon zest, lemon juice and vanilla extract. Beat for another minute. 
  3. Pour the almond flour mixture into the beaten egg whites. Fold the mixture gently until incorporated. If desired, add yellow gel colouring at this point. Continue folding until batter is smooth and falls off the spatula in a thin flat ribbon. Be careful not to over mix it as the batter will get thinner as you fold.
  4. Transfer the batter into a pastry bag with a round tip. Pipe out 1-1.5 inch rounds about 1 inch apart onto baking sheets lined with parchment paper. Tap the baking sheets on the counter top a few times.
  5. Let the macarons sit for 30 minutes to 1 hour until the tops are no longer sticky to the touch.
  6. Bake the macarons in a preheated oven at 150 degC for 15-20 minutes. The macaroons should have risen slightly to form "feet".
  7. Transfer the macarons to a wire rack to cool completely.
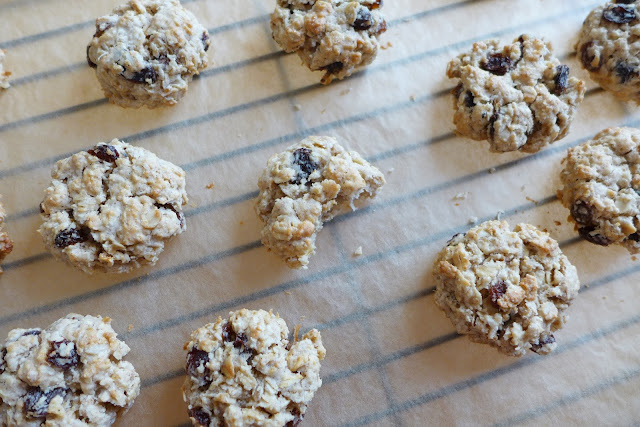
Lemon buttercream
  1. Beat the butter. Add icing sugar, lemon juice and vanilla extract and beat until combined.
  2. Transfer the buttercream into a pastry bag and fill the macarons - or just spread it onto the shells and pop it into your mouth!

Saturday, 16 July 2016

Coconut macaroons


Sometimes I find it difficult to "get the engine started" again after a hiatus of several months. My inactivity in the kitchen has rendered me a little helpless when I had to prepare my own meals again. I found myself lacking when I had to make dinners - this stems from being home long enough to get used to having Mom do all the cooking. As much as I love cooking, I miss that so much!


To address the issue with my cold start, I decided to make something real simple this weekend. As a treat, I made macaroons - with the double O! In contrast with the touchy and high-maintenance French macarons, these double-Os were much easier to make and handle.


In spite of having contrasting temperaments and looking obviously very different from each other, the two cookies are made with a base of egg whites and sugar. However, macaroons do not require the extreme delicacy and painstaking efforts involved in the making of its more elaborate "cousin".


It took no more than 30 minutes to make these coconut-ty goodness with a toasted crunchy outside and soft chewy middle. I'll try adding some dried fruits or/and nuts for a little extra crunch the next time!


What?
  • 1 1/2 cups shredded coconut
  • 2 egg whites
  • 1/4 cup sugar
  • 1/8 tsp salt
  • 1/2 tsp vanilla extract
How?
  1. Whisk the egg whites, sugar, salt and vanilla extract together until mixture is frothy.
  2. Pour in the coconut and stir until evenly moistened.
  3. Shape the coconut mixture into small balls of about 1 inch in diameter, and place them on a baking sheet lined with parchment paper. 
  4. Bake the coconut balls in a preheated oven at 180degC for 10-15 minutes, until the macaroons are golden.
  5. Let the macaroons cool for about 5 minutes before transferring them onto a wire rack to cool completely. For a more chocolaty flavour, you can drizzle (or simply dip them!) the cooled macaroons with chocolate!

Sunday, 24 April 2016

Cinnamon raisin muffins


It's finally the weekend - finally time all to myself, for myself, to reboot my brain and unwind. The work week has given me a literal headache. I wonder if every profession faces the same frustration of waiting to rush, and rushing to wait. This really gets on my nerves. I wish I have a time locket which can be used to store all the time "wasted" while waiting, and release them for good use when the sudden load of work arrives.


After a tiresome week, I just wanted a fuss-free, sweet treat. These cinnamon raisin muffins are for a lazy day, when you simply just want an oven-baked dessert with the least amount of effort. You can almost never go wrong pairing raisins with cinnamon!


These muffins don't have to be cooled completely before serving. Best when slathered with butter when warm!

What?
  • 1/2 cup raisins
  • 1 cup plain flour
  • 1 1/4 tsp baking powder
  • 1/4 tsp salt
  • 1/2 tsp ground cinnamon
  • 1/4 cup brown sugar
  • 1/4 cup caster sugar
  • 1/8 cup olive oil
  • 1 egg
  • 1 tsp vanilla extract
  • 1/2 cup milk
How?
  1. To plump the raisins, place them in a bowl and pour boiling water over. Leave for 5-10 minutes, drain well and set aside.
  2. Mix the flour, baking powder, salt, cinnamon and sugars together.
  3. In a separate bowl, whisk the oil, egg, vanilla and milk together until they are blended.
  4. Pour the wet ingredients into the dry ingredients. Mix until just combined and fold in the raisins.
  5. Fill muffin cups with the batter up to 2/3 full. Bake in a preheated oven at 190 degC for 15-20 minutes until a toothpick inserted into the middle comes out clean. 
  6. Transfer muffins to a wire rack to cool. Best served warm with some butter and jam!

Sunday, 10 April 2016

No-knead white bread


Touted as the easiest bread to bake, this no-knead bread is of artisan quality with minimal effort. It does take a long time to rise; I left it overnight. This seemingly unsophisticated plain bread quietly does the job on its own, rising ever so slowly that it's almost unnoticeable if you just sit there and watch it.

It's hard to take credit for the soft inside and crusty crust - it did it all on it's own.


This unassuming white bread is good for making savoury sandwiches or simply with butter and jam.


This recipe is much simpler compared to the cinnamon swirl raisin bread I made a week ago, and would be a good start to try making your own bread (without a bread making machine!) for the first time. Try it, it's therapeutic!

What?
  • 1 1/2 cups plain flour
  • 1/2 tsp yeast
  • 3/4 tsp salt
  • 3/4 cup warm water
  • Olive oil to grease

How?
  1. Stir flour, yeast and salt together.
  2. Pour the warm water into the flour mixture and stir thoroughly. The dough will look rough at this point.
  3. Lightly coat the entire surface of the rough with olive oil. Cover the bowl with a cling film and a towel on top. Leave it to rise for about 8 hours.
  4. The dough will look risen, smoothen out and slightly bubbly after 8 hours. Turn it out onto a lightly oil countertop fold it over once or twice. Shape the dough into a rectangle shape and place it in a greased loaf pan. 
  5. Cover the loaf pan with cling wrap and let it sit for another hour.
  6. Before baking it in the oven, cover the top of the loaf with a piece of parchment paper. Bake the loaf in a preheated oven at 200 degC for 30 minutes. (You can slash the top of the dough with a sharp knife if you want to!)
  7. Remove the bread from the oven and wrap it in a clean kitchen towel if you want to keep it warm for serving. Slice and serve!

Saturday, 2 April 2016

Cinnamon swirl raisin bread


There has always been something therapeutic about baking, about making bread. Baking isn't all about the frivolous; research has shown that this activity can be a crucial therapy that helps thousands of people suffering from depression.


It is more than just indulging in the final product - there is something reassuring and soothing about the entire ritual.


Some people think it is in the kneading process. I like watching the dough rise and getting all poofy.

Try it on one of those "down" days, maybe this will make you feel better. :)


What?
  • 1/2 cup milk, lukewarm 
  • 1/2 cup warm water
  • 7g easy bake yeast
  • 1 egg
  • 1/8 cup brown sugar
  • 1/8 cup caster sugar
  • 1/2 tsp salt
  • 40 g butter, softened
  • 1/2 cup raisins 
  • 3 cups plain flour  
For the cinnamon filling:
  • 1 tbsp milk
  • 1/4 cup caster sugar
  • 1 tbsp ground cinnamon

How?
  1. Dissolve the yeast in warm water. Mix in the egg, brown sugar, caster sugar, salt, butter and raisins. 
  2. Stir in the milk.
  3. Add the flour gradually until a dough is formed. (It will be a little sticky!) Knead the dough on a floured surface for a few minutes.
  4. Lightly grease a mixing bowl (I used olive oil) and turn the dough around in the bowl to coat the dough surface with oil.
  5. Cover the bowl with a damp cloth and allow the dough to rise until doubled - this takes about 1-1.5 hours.
  6. Roll out the dough into a rectangle about 1/2 thick (and roughly the 9" length wise). This can be done on a lightly floured surface. (I used a cling film instead!)
  7. Prepare the cinnamon filling by mixing together the caster sugar and cinnamon. Spread a tablespoon of milk onto the rolled out surface of the dough and sprinkle the cinnamon mixture on the top. 
  8. Roll up the dough lengthwise tightly and pinch the bottom together.
  9. Place the loaf into a greased loaf pan (pinched end facing down). Leave to rise, uncovered, for about 1 hour.
  10. Bake in a preheated oven at 175 degC for 30 minutes, or until the loaf is lightly browned and sound hollow when tapped.
  11. Leave the bread to cool before slicing. 

Saturday, 26 March 2016

Easter egg cakes

Did you know that eggshells are really strong? If you try squeezing the ends of an egg between your palms, you'd notice that it'd withstand considerably greater force than expected. Or you can try the following below...


Besides using eggshells for supporting weights, you can use them for baking in place of the usual muffin cups/tins!


Happy Easter everyone!

What?
  • 3 eggs
  • 150 g butter
  • 150 g sugar
  • 2 tsp vanilla essence
  • 150 g plain flour
  • 1 tsp baking powder
How?
  1. Cream butter and sugar together.
  2. Prepare the eggshells to be used during baking. Carefully crack the eggs at one end. Peel a small hole at the top of each of the eggs. Pour out the contents of the eggs into the butter mixture. I used a chopstick to help empty out the eggs. Soak the emptied eggshells in salt water for 30 minutes (to rid of bacteria). When done, rinse them with cold water and put them to dry hole-side-down on a kitchen towel.
  3. Add the vanilla essence to the butter mixture as well and stir to combine.
  4. Mix in the plain flour and baking powder until just combined.
  5. Place the prepared eggshells onto muffin tins. Use aluminium foil or parchment paper to help stabilise the eggshells.
  6. Put the batter into a piping bag fitted with a large round tip. Pipe batter into prepared eggshells until about 3/4 full.
  7. Bake at 180 degC for 20 minutes.
  8. Cool eggs before crackin' and enjoy!

Saturday, 19 March 2016

Rocky road brownies

It is suddenly Spring!


Just two weeks ago it was blustery and cold, I found myself scrapping ice off my windscreen. It was a pain - but look at the pretty crystallisation! :)


In the midst of grumbling over how chilly it (still) was, I've let Spring come unnoticed. I pondered how I could have not seen the blooms, how I could have missed those. 


It seems that I've allowed negativity to overcome (or even consume!) me in mere moments that I've missed the good things happening around me. 

Like every season, "this too shall pass", and every obstacle encountered is but only a temporary hindrance. I shall look for the positive lesson in every situation and move on. And have some brownies. :)


What?
  • 2 eggs
  • 3/4 cup cocoa powder
  • 1/2 tsp salt
  • 1/2 tsp baking powder
  • 1/2 tsp coffee powder
  • 1 tsp vanilla essence
  • 120 g butter, melted
  • 1/2 cup sugar (I used 1/4 brown sugar, 1/4 caster sugar)
  • 3/4 cup plain flour
  • 1/2 cup nuts (I used pecan)
  • 1/2 cup mini marshmallows
  • 1/2 cup chocolate chips
How?
  1. Stir eggs, cocoa powder, salt, baking powder, coffee powder and vanilla essence until combined.
  2. In a separate bowl, stir in sugar to melted butter. When butter is warm (not hot), add it too the cocoa mixture. Stir until smooth.
  3. Add flour to the batter and stir until just combined.
  4. Add nuts, marshmallows and chocolate chips and stir until fully incorporated.
  5. Spread batter into pan lined with parchment paper and baked at 180 degC for 20-30 minutes. The batter should be moist but not wet.
  6. Remove from oven and top with more marshmallows and drizzle with chocolate if desired! Cool on a wire rack before serving.


Sunday, 6 March 2016

Steamed Kuih Bakul

I'm not too sure if "post-festival withdrawal symptoms/blues" are a real thing... But if they were, I'm sure feeling it now.

However, one of the best things about post CNY is that we can now eat the 年糕!


I used to think 年糕 was written as 黏糕, the former literally means "year cake" and the latter "sticky cake". I thought "sticky" made sense as it signifies a complete reunion, that a family and friends stay close and prosper together (this is where the 糕 = 高 part comes into play). My mom told me this year that niangao (年高) implies prosperity for the year as in 年年高升, and not 粘在一起...

In any case, ti kueh (hokkien/teochew name for Kuih Bakul; gosh is this cake complicated or what!) is very versatile and can be made into a savory dish with meat and cabbage or added into soup. It can also serve as a between-meals snack when pan-fried with egg and sweet potatoes and yam, or steamed and coated with coconut. Though I have not tried the savoury versions, the sweet ones are amazing good! (making the steamed ones is super fast and no-frills...)


What?
  • Kuih Bakul
  • Dessicated coconut
How?
  1. Cut / slice Kuih Bakul into smaller pieces (roughly  5 x 4 x 2 cm cuboids).
  2. Steam Kueh Bakul and dessicated coconut for about 10 minutes.
  3. Coat the Kueh Bakul in coconut. (It will be sticky!) Serve and enjoy!

Saturday, 5 March 2016

Four-ounces chocolate chip walnut cookies


This is probably one of the largest cookie I have ever made.


This is a "copycat Levain cookie recipe". Levain cookies are affectionately known to be the best cookies in the world to many people living in NYC (and probably to those who don't as well)! Unfortunately for me, this is a "been there, but never done that" and hence I am unable to tell how close these huge-ass cookies get to the real thing...


But nevertheless, these cookies are pretty darn good! And I'm not kidding when I named this a four-ounce cookie. With the diameter of roughly my palm size and height of about an inch, it IS the size of a regular scone.


Crisp on the outside, but super soft and doughy in the middle. Mmm. Best served warm!

What?
  • 1 1/2 cups plain flour
  • 3/4 tsp baking powder
  • 1/2 tsp salt
  • 115 g cold unsalted butter, cubed
  • 85 g brown sugar
  • 50 g caster sugar
  • 1 egg, cold and lightly beaten 
  • 1 tsp vanilla essence
  • 3/4 cup chocolate chips
  • 1/2 cup walnut, coarsely chopped
How?
  1. Combine flour, baking powder and salt in a bowl.
  2. In a separate bowl, beat the cold butter with a mixer for about a minute until it comes together in one lump. Add the brown and white sugar and beat until incorporated.
  3. Add the egg and vanilla and mix until combined. Batter appears lumpy.
  4. Gradually add in the flour mixture and mix until just incorporated. 
  5. Fold in the chocolate chips and walnuts with a spatula.
  6. Divide the dough into about 4 oz. each and roughly shape them into a ball (not too perfectly!). Place the dough balls onto a cookie sheet lined with parchment paper, spacing them a few inches apart.
  7. Refrigerate the dough for 30 minutes to an hour.
  8. Bake at 180 degC for about 15-20 minutes, until light golden brown on the top and edges. Allow the cookies to cool for about 5 minutes before transferring them to a wire rack to cool completely. (But have one while it's still warm!)
Adapted from: Chez CateyLou